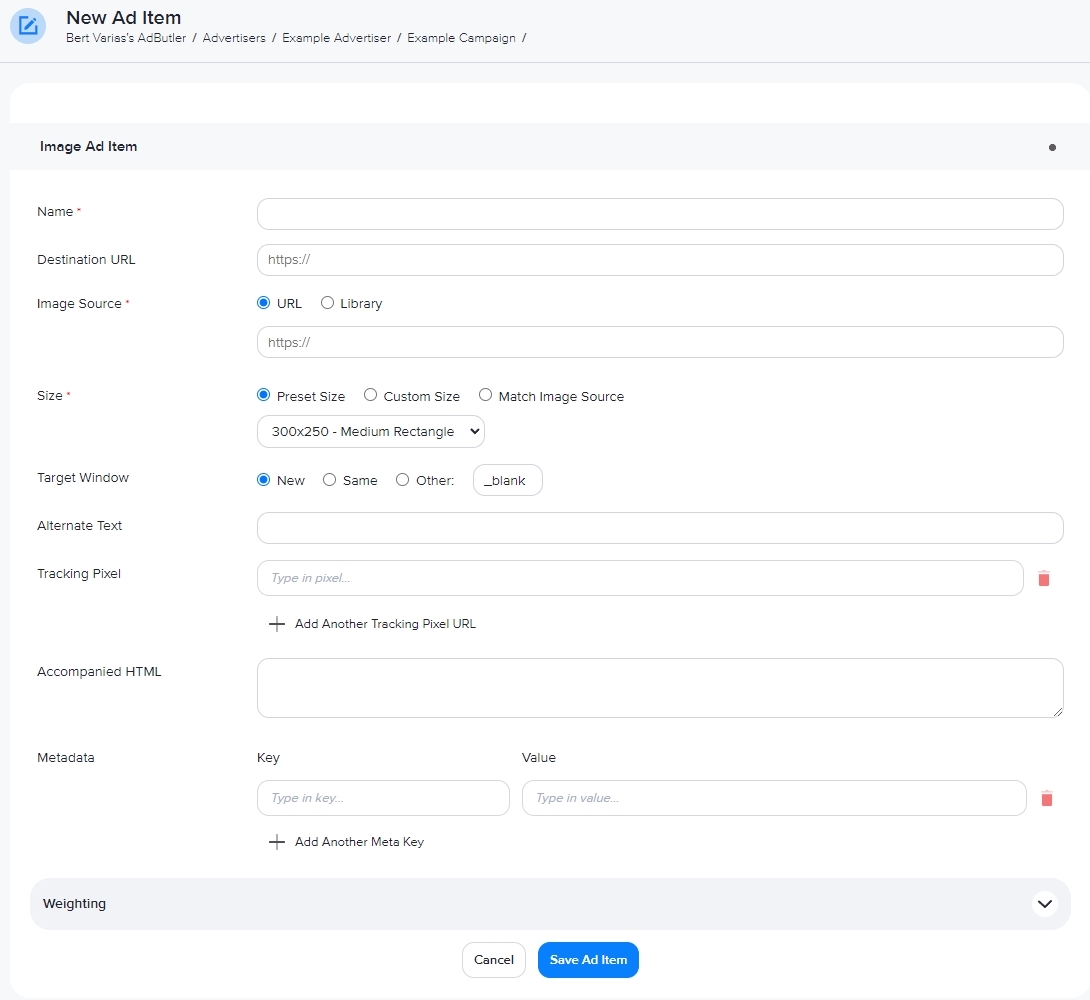
How to create an image ad item
Image ad items are one of the simplest and most common ad units. AdButler accepts JPEG, PNG, and GIF files for image ad creatives. This guide will show you how to create an image ad item. It assumes that you already have or know how to make a campaign.
You can capture static image files of your native ads and use those images in image ad items.
Creating an image ad item

- Go to the section of the relevant campaign (Advertisers > Your Advertiser > Your Campaign).
- Click Add Ad Item at the top right of the Ad Items table. The Ad Item type window will appear.
- Click Image. The New Ad Item settings will appear.

- Give the ad item a name.
- If the image is hosted online, enter the URL of the host in Image source. Otherwise, click Library and either upload an image from your computer or select an image from your Media Library.
- Make sure that the dimensions in the Size field match the size of the zone to which the campaign will be assigned.
- Fill in the rest of the fields. See the table below for details.
- Click Save Ad Item. You will be taken back to the campaign section, and the ad item you just created will be listed in the table of ad items.
Note that the maximum file size for image ad items is 100 MB
Optional image ad item fields
| Destination URL | The URL users will go to if they click the ad item. If you enter a URL, you can test it by clicking Open Destination URL to the right of the field. |
| Target Window | If there is a destination URL, this setting specifies whether the browser will open the URL in a new window or in the same window. New is usually the best option. |
| Alternate Text | The alt text or tag for the image. Used to describe the ad item for people using a screen reader. |
| Tracking pixel | The URL of the impression tracking pixel. Click + Add Another Tracking Pixel URL to add more tracking pixel links. Click on the red trash can icon to delete a tracking pixel link. |
| Accompanied HTML | A link that will be shown directly below the ad item. Cannot be used to deliver scripts. |